
Here's a lil' something that I did for Mom on Mother's Day :)
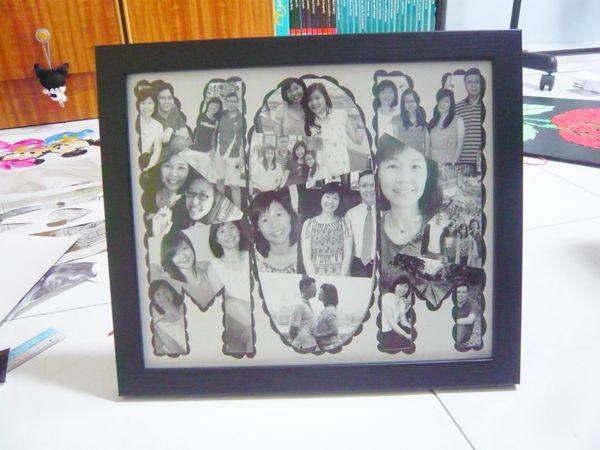
A photo collage of the happy moments our family had with Mom!
Photo collages never, ever go out of trend... And best of all, they make really gorgeous and full-of-love gifts. The whole process was a though time-taxing, but a awesomely enjoyable one.
What you will be needing:
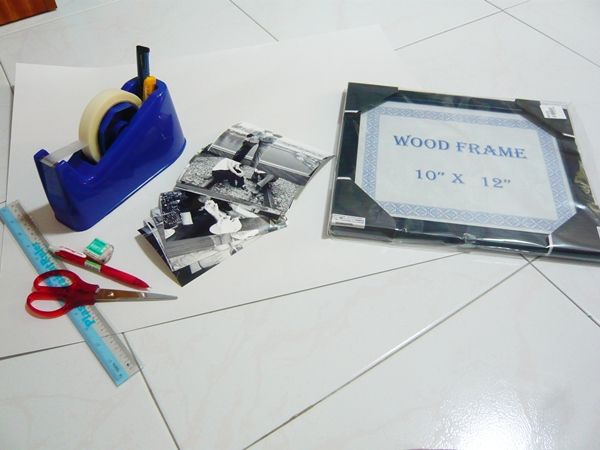
Stationary, Scotch tape, 15-20 black and white photos, white cardboard/vanguard and a 12-15" frame with black borders.
Shiberty did her collage in black and white as well to give it the "timeless effect" (as stated by her), so I decided to try it out in black and white as well. In fact any colour could be used but I figured that I've been making gifts with vivid colours all these while so I could might as well take this opportunity to try out something new :)
It is most advisable to use frames of at least 12" so that the pictures could be seen from afar. Oh and black borders are also an ideal choice for it creates a classier overall look.
Step 1: Measure the white vanguard to the dimensions of your frame and cut it out. Draw block letters on the vanguard and cut them out.
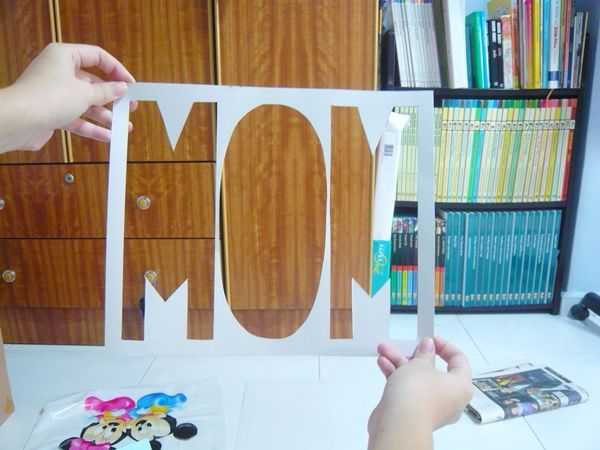
The vanguard will look something like this after cutting the letters out.
Be careful to leave a margin of at least 1cm along the edges of the vanguard if not the collage will look very squeezed up and crushed inside the frame.
A good number of letters to use would be 3. Any number would be fine, but based on the size of my frame 3 letters could bring out the best of the photos. 3 is also a more regular number to use, eg. MOM, DAD, I♥U, IMY, SIS, BRO etc.
Step 2: Now's the fun part! Cut pictures of different sizes and shapes to fit into the vanguard cut-out.
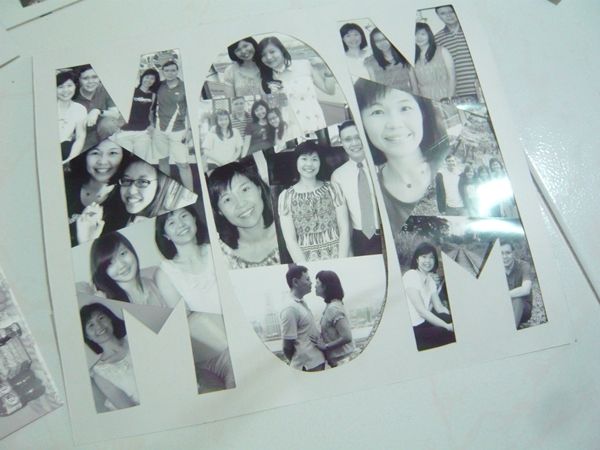
The filled up letters!
I chose the prettier pictures to be placed into the letter 'O' 'cos that where the most emphasis would be since it is in the center of the entire frame. There should be a variety of close-up shots and family shots!
Step 3: As seen from the above picture, the MOM doesn't look very prominent with all the pictures filled in. Thus to make the word look more outstanding, an outline will be needed.
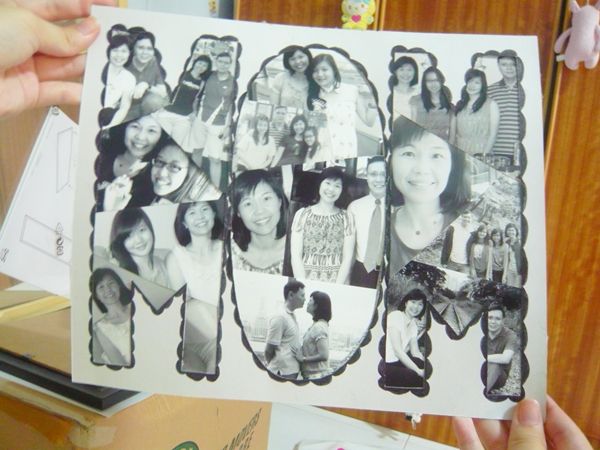
Does the MOM look more distinct now?
I used the lace outline like how Shiberty did it, but it's always okay to use other outline designs :)
Step 4: Cut out another piece of vanguard of the same dimension as the first one and past it behind the first one to make the collage sturdier and also hides the not-so-presentable backs of the photo cut-outs.
Step 5: Give the frame a good wipe and fit the collage in.
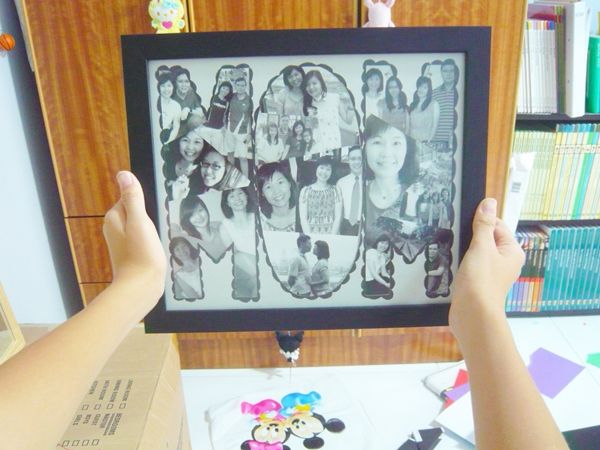
Volia! Done with the photo collage!
Felt sooooooooo satisfied after completing it. Can't help but smile at it each time I look at my end product :))))

This is now sitting neatly in the living room's display set!!! *proud*
My mom loved it very much! Although this entire project took me 3hours and cost me $27, it was totally worth it 'cos we now have something new - and made by moi to place in the living room!
This photo collage idea is a very versatile gift for many occasions as well! Photos, afterall will always be able to bring back memories and hence watch your loved one/friend burst in happiness when you present them with the photo collage!
HAPPY DIY-ING!